Wednesday, December 28, 2011

From the Sublime to the Ridiculous; Food Stories of 2011

More of us are near farmers markets with winter hours.
Some efforts were noble; some, well, you’ll see.

Part 1
1) I met the people from Red Jacket Orchards at the farmers market in Union Square.  Their apple and apple-combo (raspberry, pear, etc) juices are unsweetened and addictive. This year, they did something about food deserts by teaming up with local bodegas to supply and stock 'skinny fridges' with healthy fruits and vegetables.  Finding a new market for their great fruits and juices by surmounting the distribution hurdles in low income areas benefits buyer and seller.
http://manhattan.ny1.com/content/top_stories/149580/-skinny--fridges-provide-healthy-produce-in-city-bodegas

2) The last few years have seen a rise in urban farming. Now, see if you can spot a winter farmer’s market in your area.  There are an estimated 1,200 markets open through coldest months.  That’s an increase over 2010 of about 38%.  This is not just a southern US trend says the USDA who tracks winter markets cropping up in Vermont, Rhode Island, Michigan and Colorado. “Hoop house” technology is heralded as one major reason for the increase.  It’s an inexpensive way for smaller growers to extend their seasons.  Consumers get to enjoy more cold weather crops like spinach and winter squash. The top three states with winter farmers markets are New York, California and Pennsylvania.  To find a farmers market near you, check the USDA listing at http://search.ams.usda.gov/farmersmarkets/default.aspx

3) And while we are on the subject of the freshest produce, 2011 saw a trend become a habit: the use of assistance (WIC vouchers, seniors and supplemental food programs) being used with dignity and cheerfulness at farmers markets.  I’ve witnessed the acceptance and growth at open air markets in suburban and city sites over the past few years and this summer saw a marked increase in the normalcy of this smart use of resources.  (Note the USDA Farmers Markets link above also includes payment methods and programs accepted at each market.)

4) Tired of walking around at the mega-store?  You are not alone.  After decades of bigger is better, fatigue has set in  especially among older shoppers.  Retailers are responding.  Smaller footprints at grocery stores (and other retailers) are on the rise so that more of what you want is closer.  Prototype stores in Germany even play oldies music, feature non-slip floors and have steps designed into shelving for safer reaching. The trend is moving stateside with chains including Walmart launching some smaller sites (theirs are called Marketside).

Part 2
1) Celebrity investing in food-related businesses and restaurants isn’t new. Newman created a line of organic supermarket staples, Coppola bought a winery, Tom Selleck grows avocados.

But this year things went a little over the top as Great Britain got to sample produce and livestock stamped with famous names. Move over Neiman Ranch.  It is now possible to consume Elizabeth Hurley pork chops.  I can’t wait for the red carpet to roll out at supermarkets in this country.  Crispins and Macouns from Gwyneth’s Apple Orchard?  And I’ll start checking the tiny labels on the avocados to see if any marked Selleck has found its way into the bin.
http://www.guardian.co.uk/lifeandstyle/wordofmouth/2011/nov/01/celebrity-farmers-a-list-ingredients

2) The oversimplification of nutrition news has lead to widespread misapplication of so-called  “functional” foods.  Alternating poor food habits with a shot of green tea for its cancer fighting properties or an order of salmon steak to stave off heart disease are examples of our band-aid mentality when it comes to health and eating.  Restaurants are onto our mix and match approach.  More and more are offering healthy choices alongside the indulgent, slightly questionable ones (the industry calls this a ‘double-sided’ menu).  You know my perspective, if it's actual food (e.g. you recognize the ingredients as food stuffs) it’ probably better for you than things you eat with non-food ingredients.  Eat real food at every meal and neither health nor deliciousness will be sacrificed.

3) 28% of Americans over 25 cannot cook.  So says Market Watch who’s 2011 study for Bosch home appliances found that nearly a third of us have lost this rudimentary skill.  I have heard similar statistics before and found them hard to fathom but a little observation has shown me that the figure is probably not far off.  The easy availability of breakfast-lunch-dinner and all the snacks in between has made it quite simple to get around turning on the stove. While more prepared pure food choices are on the rise, we most often select something more indulgent on our double-sided menus.  It may take us until we reach 50% non-cooks, but at that point I predict a rise of cooking instruction and cookbook sales.  At least, I hope for it.

Friday, December 16, 2011

Holiday Cheez-ies

The Lee Brothers of southern cooking fame made goldfish crackers a pure thing—all natural ingredients.  From there bloggers everywhere saw the potential for cheez-its. Before Cheez-its were boxed up by a corporate kitchen they were mini cheese crackers baked up with real cheese and lots of it.

Here’s my version, made holiday ready with mini-cookie cutters in snowman, tree and star patterns (as well as the traditional square with center hole).  Pick a cookie cutter pattern that benefits from little holes poked into the dough with a skewer.  It helps the cheese puff more evenly and provides an artistic touch to your work. 

This is an easy dough to make and work with.  Kids will enjoy helping.  If the dough stays out a while and becomes too pliable put it the refrigerator for 10-15 minutes. This dough is like pie pastry and likes to be kept chilled.  You can also cut out the cheez-ies then chill the cut-outs on the baking sheet in the freezer for about 5 minutes or for a few hours.  Bake as usual. 

Homemade Holiday Cheez-ies
Yield: never enough

1 1/2 (6 ounces) cups grated hard cheese*
4 ounces unsalted butter
3/4 cup flour (all purpose or whole wheat)
1/4 teaspoon salt
1/4 teaspoon tumeric
1/4 teaspoon paprika
1/8 teaspoon black pepper
1-2 tablespoons milk (or light cream)

Method
  1. Preheat  oven to 350˚F. 
  2. Place cheese, butter, flour, salt and spices in a food processor. Pulse until the mixture is just combined and the flour mixture looks a bit crumbly.  
  3. Add milk, a little at a time and pulse again.  Add more milk until dough just comes together. 
  4. Place dough on a floured surface or wax paper. Use lightly floured hands to form the dough into a flat disc, about 1 inch thick.  Refrigerate dough for 15 minutes or overnight.  
  5. When ready to bake cheez-ies, place dough on a floured surface and roll into a rectangle, about 1/16 inch thick. Use mini cookie cutters to cut dough into shapes and transfer to a cookie sheet.  (You can also cut the dough into 1-inch squares using a knife or pasta wheel.) 
  6. With a skewer, poke a few holes into each cheez-ie either in the center or create a pattern that matches the shape.  (Buttons for the snowman, garland for the tree, etc.)
  7. Bake cheez-ies for 15 minutes, or until the edges begin to brown.  Cool for a few minutes on the baking sheet before transferring to a cooling rack. 
Cooled cheez-ies should be stored in an air-tight container. They can be frozen and reheated in a warm oven (under 200˚F).
Cheez-ies are a grown-up cocktail snack but still kid friendly. They go well with soup and can even stand in as croutons in salads. 

Thursday, December 8, 2011

Hasty Indian Pudding

Served with vanilla ice cream and a roasted pear quarter
Indian Pudding.  Not everyone knows what this is.  Those who do might swoon when you serve it. 

It’s nostalgic; it’s New England. The trouble is recipes for this light corn meal-based pudding sweetened with molasses, ginger and cinnamon always serves large quantities (10-12) and takes hours to cook.  Hard to enjoy in a small household and burdensome if the holiday dessert table is already brimming with pies and sweets.

Given its origins, applying old English recipes for Hasty Pudding to New World ingredients (corn meal, molasses, ginger and nutmeg)*, it really belongs somewhere on the American holiday table.  And maybe we should start calling it Pilgrim Pudding to be really up to date.

Here’s a version that serves four-five that will encourage nostalgia in your family.

Hasty Indian Pudding
Serves 4-5

Ingredients
Butter for baking dish
2 cups milk (whole is richer but you can use 1% or 2%)
1/3 cup finely ground cornmeal
1/4 cup molasses
2 tablespoons butter
2 tablespoons brown sugar
1/2 teaspoon salt
1/2 teaspoon cinnamon
1/2 teaspoon ground ginger
large pinch nutmeg (freshly grated if available)
1 teaspoon vanilla
1 egg
hot water for bain mairie (water bath for baking)

Method
  1. Preheat oven to 350˚F.  Butter a 1-quart strait-sided casserole/soufflé dish. 
  2. In a 2-quart heavy bottomed saucepan, bring 1 1/2 cups of milk to a boil.  Meanwhile, stir together the remaining 1/2 cup milk and cornmeal.  
  3. When milk begins to boil, lower heat to simmer and stir in cornmeal-milk mixture.  Cook cornmeal mush for 12-15 minutes stirring with a whisk or heatproof rubber spatula until mixture is creamy and smooth.  
  4. Remove from heat.  Stir in molasses, brown sugar, salt, spices and vanilla.  
  5. Crack the egg in a small bowl.  Stir in 1/2 cup of cornmeal to temper egg and return mixture to pan.  Stir to combine all ingredients thoroughly.  
  6. Pour pudding into buttered baking vessel.  Set inside a high-sided roasting pan and fill pan with hot water to reach at least halfway up baking dish.  
  7. Bake 90 minutes at 250˚F.   Let rest 15-30 minutes.  Pudding will lose it’s soufflé-like puff but remain light. Serve with a side of good quality vanilla ice cream or freshly whipped cream. Warm fruit is also a nice compliment.

Indian Pudding can be made ahead and reheated on low in the microwave before serving.  Or, it can be reheated, covered, at 350˚F while the main course is enjoyed.  If you bake it during dinner, you will  have a leisurely progression from main meal to dessert.  Our family always needs a bit of a break between courses at the holidays. 

* Thanks go to Linda Stradley’s excellent food history website for the traveled history of this dish.  http://whatscookingamerica.net/History/HastyPudding_IndianPudding.htm

Sunday, December 4, 2011

Fennel & Artichooke Shaved Salad

Interesting salads often leave the dinner table when cold weather sets in and nothing more than limp lettuce or pale tomatoes are in stock.  Lamentable because heavy winter stews and rich simmered dinners are complimented by something light and refreshing like a side salad.  A shaved salad is the answer and creatively transforms many ho-hum ingredients.  The main ingredient is sliced very thin-- shaved- making it easy to eat raw. 

These salads feel very sophisticated and continental but you know their humbler cousins in the form of cole slaw and carrot-raisin salads.  Just like them, shaved salads are great ahead of time sides because they benefit from a little marinating time in the dressing.   Most shaved salads use a mandolin to get the vegetables extra thin.  I’ve also used a vegetable peeler on zucchini, asparagus and radishes or even a very sharp chef’s knife to create thin slices—close to 1/16 of an inch thick is best. 

There are inexpensive vegetable slicers with good hand protection if a mandolin is out of the budget or safety range of your household.  (We put our mandolin away in favor of a simple slicer that is safer and easier to clean and maintain years ago.)

Fennel & Artichoke Shaved Salad is simple to make.  The salad is balanced by a citrus vinaigrette which mellows the raw flavors. It goes nicely with an Italian meal and you will find it on the menu of many upscale Italian restaurants.  There are lots of other fun combinations to play with—just open your vegetable drawer for inspiration. 

Fennel & Artichoke Shaved Salad
Serves 6

Ingredients
6 baby artichokes, raw
1 large fennel bulb
Juice of 2 lemons
Juice of 1/2 orange
3 ounces extra virgin olive oil
salt and pepper
1 tablespoon fresh parsley, chopped
1/2 Asian pear (or apple), sliced thin using a vegetable peeler or paring knife
1/2 ounce Parmesan cheese shavings (use a vegetable peeler to get large shavings)


Method
  1. Prepare artichokes by peeling away outer leaves until you reach pale green leaves.  Cut off stem and tips of leaves so that only tender leaves and heart remain.  Squeeze some lemon juice over the artichokes as the they are prepared for slicing.  
  2. Using a vegetable slicer, draw the artichoke along the blade holding it so that the leaves pass through the slicer with tips up.  Place slices in a bowl and pour remaining lemon juice and half the olive oil over artichoke slices.  Lightly salt and pepper mixture.  
  3. Prepare fennel.  Peel away any discolored outer pieces of bulb.  Drag across slicer to create thin slivers of fennel.  Place in a separate bowl with orange juice and remaining olive oil. Lightly salt and pepper mixture.  
  4. Cover both bowls tightly and store at least an hour or up to 5 hours.  
  5. To serve, alternate spoonfuls of artichoke and fennel over greens.  Sprinkle with parsely and garnish with generous portions of Asian pear and Parmesan cheese.  Spoon on extra vinaigrette at the table.
Master Recipe for Shaved Salads
  • 1-2 types of raw vegetables, shaved or sliced 1/16” thick
  • Vinaigrette
Optional (add as a garnish)
  • A few shavings of a hard cheese like Parmesan, Ricotta Salata, Manchego, Aged Cheddar
  • Nuts or seeds, dried fruits including cranberries, cherries, raisins, apricots
  • Fruits including thinly sliced apple, pear, Asian pear.
  • Fresh herbs like parsley, mint, tarragon, cilantro, basil, etc
Combine sliced vegetables and dressing for a minimum of one hour.  Serve with extras.  Pass extra dressing.


More Ideas:
  • Shaved Brussels Sprouts with hazelnuts served with a lemony buttermilk dressing
  • Shaved winter squash with toasted pepitas and cheddar with a smoked chili dressing
  • Celeriac and Asian Pear in a honey-mustard vinaigrette
  • Shaved Mushrooms and Carrots over Spinach dressed with grated ginger, sesame oil and rice wine vinegar
  • Thinly sliced radishes and cucumber in equal parts water & rice wine spiked with a dash of salt and sugar (or honey)
Other candidates for shaved salads include cauliflower, red bell pepper, beets, zucchini, carrots, celery, asparagus.  Check your vegetable drawer for more possibilities.

Sunday, November 27, 2011

Red Meat Sauce and Its Hearty Vegetarian Sibling

Turkey Antidote.  Meat Sauce.  There’s a vegetarian version here too. 

Make a big batch of the classic meat sauce and serve it family style over a platter of wide fettuccini noodles or sauce-catching rotini pasta.  With a generous green salad laced with shaved Parmesan and warm bread this is a satisfying transition out of turkey time. 

My version mixes classic Bolognese sauce recipes with a simple meat sauce packed with extra vegetables.  To make this more Bolognese-like, add the optional milk or cream at the end before serving.

House Meat Sauce
Makes 7-8 cups sauce

Ingredients
2 carrots
2 celery stalks
1 medium onion
8 oz mushrooms
1 zucchini
2 tablespoons olive oil
2 pounds ground meat (any combination of beef, veal, pork and turkey)
1/2 cup dry white wine
1/2 cup milk
1 28 oz can tomato puree
1 28 oz can chopped tomatoes
2 tablespoons grated parmesan
1 teaspoon sugar or honey
1 teaspoon salt
1/2 teaspoon black pepper
Optional: 1 cup cream or while milk


Method
  1. 
Peel and coarsely chop carrots, celery and onion.  Place in a food processor and process to a very fine dice.  Put mixture in a large pot.  
  2. Next, place roughly chopped mushrooms and zucchini in food processor and process to a very fine dice.  (By separating the harder and softer vegetables, you will not over process the mushrooms and under-chop the hard carrots.   You can also grate the carrots and finely chop the remaining vegetables by hand if you don’t own a food processer.)  
  3. Add the mushrooms and zucchini to the pot and add vegetable oil.  Sauté over medium heat until vegetables are tender.  
  4. Push vegetables to the side of the pot and add ground meats. Add a bit more vegetable oil if needed and cook meat, stirring occasionally until no longer pink.  
  5. Add wine and cook for 2-3 minutes, then add milk and continue cooking another 2-3 minutes until most of the liquid is absorbed.  
  6. Lower heat and add tomato puree and tomatoes plus remaining ingredients (except cream).  Cover and cook sauce on very low heat – barely a simmer- for 90 minutes.  Check sauce and stir as needed to ensure it is cooking on a low simmer.  
  7. If adding cream/milk, stir in now and cook 5 minutes longer before serving sauce.
“Vegetarian Bolognese”
Omit the meats and double the amount of mushrooms and zucchini.  A small eggplant can also be peeled, diced and added (about 2 cups) during the sautéing period of the recipe.   I also like to add 1/3 cup ricotta cheese to the vegetarian version. 

Freeze cooled leftover sauce in portions that fit your household.  Reheat for another simple pasta night or use it in lasagna, over manicotti or stuffed shells. 

Note: Bolognese recipes rarely contain herbs or spices.  Add them if you like or serve the sauce with a handful of fresh, shredded basil on each plate.  

Saturday, November 19, 2011

Stuffing Bread

This is the time of year I hear very personal recipes for Thanksgiving stuffings and dressings.  Yesterday I heard parts of a secret recipe with four types of mushrooms with sage and chives from the cook’s own garden.  Dried fruits are returning to popularity in some recipes and traditional sausage recipes now include chorizo and homemade ground meat blends.  Even winter squash and Brussels sprouts are squeezing into some family recipes. 

These rightly proud and sometimes secretive cooks often make their specialty a day ahead to keep guests guessing (and coming back for more).  I love the variety and we have our favorites too, an apple-sausage-pecan-cornbread number and from my family oyster stuffing.   But I also like to serve a more plain stuffing for plainer tastes at the table.  It’s a reminder that while we are a food abundant nation, dishes like stuffings and dressings were meal extenders that allowed us to serve more people and were often comprised of inexpensive and more available ingredients—bread, onion, celery—for example. 

The bread would have been homemade, day old and perhaps a bit too hard to eat out of hand.  In a broth and butter soaked stuffing, not a crumb would have been wasted.  These are hectic days but if you own a bread maker you can make your own very plain or secret ingredient version of the traditional turkey side with some homemade bread.  It seems a shame to labor over special ingredients and then mix them with store-bought, processed bread.  This week I am making a wheat and cornmeal loaf that will absorb all the savory flavors in my recipe.  If your recipe calls for a softer, less rustic bread seek out a recipe for a simple wheat bread made with egg and some milk (to soften the crumb) or potato bread made with either mashed potatoes or (real) potato flakes.

Wheat and Cornmeal Stuffing Loaf

Ingredients
1 cup water
1/4 cup vegetable oil
1 tablespoon sugar
1 teaspoon salt
optional: 1/4 teaspoon each dried herbs (see bonus note below)
1 cup yellow cornmeal (I use a mixture of 2/3 cup finely ground and 1/3 cup coursely ground)
2 1/2 cups bread flour
1 1/2 teaspoons active dry yeast

Method
  1. Place the ingredients in your bread maker in the order recommended by the manufacturer.  Set the machine to the regular baking cycle (light crust is there is that option).  
  2. When loaf is ready, remove and cool completely.  Slice into cubes or tear into chunks and set on a tray to dry for several hours.  (You may speed this up by placing trays in a warm oven, below 200˚F for 30-45 minutes.)  
  3. Cool bread cubes before storing in an airtight container until ready to use.  Store dried bread at room temperature 1-2 days or freeze up to 3 months.


Bonus: If your stuffing recipe has sage, thyme or another dried herb you can add a 1/4 teaspoon of each into this bread recipe.

Note:
In our family we still call it stuffing even though we cook it outside the bird these days. While the turkey rests we bake the stuffing and other side dishes in the hot oven.  This safer method allows the un-stuffed turkey to cook more quickly and the stuffing will also be fully cooked and hot in no time as well.  If you think you will miss the moistness the bird’s juices impart to stuffing cooked inside the bird, add some extra broth to your recipe before baking it in a separate covered dish and baste halfway through with some pan drippings.  You can also reheat stuffing in the microwave and finish it off in the  oven if you like a bit of a crust.

Thursday, November 10, 2011

Pies-Pies-Pies

Tarte Tatin alongside the cast iron skillet it was baked in.
Earlier this fall I got a hot tip.  It came from a very reliable source over at a certain cable network.  Pies will be the next big thing.  Move over cupcakes. 

You may have already noticed the signs and not just because Thanksgiving pie season is upon us.  Whole slices of pie are suddenly finding their way into our smoothies.  They are getting baked into stunt cakes at the Reading Market in Philadelphia.  Popular pie flavors like apple, key lime and Boston cream pie have been flavoring our yogurt for some time now.

But the real thing has always been big around here. My family was in the pie manufacturing business when I was in high school and through osmosis I learned about Michigan’s cherry harvests and the educational needs of migrant workers’ children.   I helped my mother sort through pie filling recipes  destined to go on the package of the unbaked pie shell crust product. During the holidays we kids helped my parents deliver thank you pies to everyone who had helped us out the year before—especially the mechanics at the garage who kept my mother’s carpool station wagon alive (somehow).  

Later, I worked at Pillsbury’s advertising agency in New York City while they were developing their hugely successful Refrigerated Pie Crust product.   (We called it by its "code name," ARPC –all ready pie crust--- during the test marketing).  

One day, our small media planning team was asked to join a taste test in our company's kitchens.  Could tell the difference between three apple pies?  One was baked using the Pillsbury test product, one was baked with an all butter crust and one used a lard crust. The test product was good, more than good, as sales have shown these past 25 years.  Still, I was able to distinguish between the three and knew in a flash that the one everyone adored (and my foodie boss thought was made with butter) was the lard crust.  The test product came in a strong second and the butter crust was third. 

What’s special about a lard crust?  It creates those flakes we love and keeps a pie from feeling leaden in out tummies.  (These days many people use a half butter/half lard recipe to get both flavor and flakiness.) 

Despite my pie company formative years, the real reason I could identify the perfect flaky crust was that my godmother had taught me to make pie dough a few years earlier.  This was the pie we ate when we spent Thanksgiving or Christmas at her home.  One year I asked for the recipe.  She said, “No.”

This year's apple mincemeat pie, ready for the oven.  Note the streaks of white lard, visible in the unbaked crust.  Flakiness is good.
And after a breath said, “But I will show you how and then you can have the written recipe.”  

Turns out there’s a bit of technique involved.  It helps to feel the cool flour in your hands, see the cornmeal texture emerge between fat and flour, and intuit the amount of moisture in the air versus ice cold water in the measuring cup. It is tricky to describe but so easy once you've seen it done. 

So I’m afraid I'll have to stick with tradition.  No written recipe today—but one day I promise I will demonstrate how to make a perfect pie crust.  Or maybe there is someone special in your family who will show you the ropes.  For many of us, cooking together is one of the finest holiday traditions we know.  And whether you roll out your own dough or one from the dairy case, it’s hard to go wrong if you are in the kitchen with a loved one. 

If you’ve been taught by a master as I was, this may be the year to start making an extra pie for your teacher or to show someone else how to do it. 

Wednesday, November 2, 2011

Easy Roasted Fish

If, like me, you are adding more fish to your diet then you know its nice to have some quick recipes that taste hardy enough to get fans among the family.  Frozen fish fillets, like Pollack, defrost fast and roast well when placed over a bed of pre-roasted vegetables.  The steam from the vegetables helps the fish stay tender while the high heat gives the fish a rich finish.  You can use any combination of vegetables but this one with fennel, asparagus, mushrooms and red bell pepper creates a fragrant and savory foil for most white fish. 

Roasted Pollack over Fennel and Mixed Vegetables
2 servings, recipe doubles easily

Ingredients
1/2 red bell pepper, sliced
6-8 small mushrooms, whole
1 whole fennel bulb (anise) sliced
12-15 asparagus spears
1 tablespoon olive oil plus a little extra to drizzle on fish
salt and pepper
2 tablespoons fresh herbs: parsley, basil, tarragon, etc
4 (4-5 oz) Pollack fillets (fresh or frozen and defrosted)
1/2 lemon

Method
  1. Preheat oven to 450˚F.
  2. Toss vegetables with 1 tablespoon oil in a roasting pan.  Sprinkle with salt and pepper.  
  3. Roast at 450˚F for about 20 minutes, stirring halfway through, until vegetables are cooked through and slightly caramelized.  
  4. Lay Pollack fillets directly on roasted vegetables.  Sprinkle with a little additional olive and some lemon juice.  
  5. Roast another 8-10 minutes, until fish is opaque and flakes when tested with a fork.  Serve fish and vegetables alone or over a bed of rice.

Other vegetable combinations to try:
Slightly Southwest: thinly sliced celery, carrots, onion and poblano peppers.  Finish with some parsley and cilantro.
Hints of Provence: tiny potatoes, grape tomatoes, olives, haricot verts. Finish with fresh thyme and rosemary.

Wednesday, October 26, 2011

Savory Corn and Cheese Pudding

I would almost call this spoon bread due to the addition of a little corn meal to the batter. These are light and fluffy while delivering a really satisfying cheese flavor.  A nice side dish for poultry, these puddings are also perfect for a simple lunch or dinner with a salad or soup.

You may only think of corn pudding at the holidays but don’t wait until Thanksgiving to make these.  They come together so fast that they are ideal for a weeknight dinner.  They are a good substitute for potatoes.  If you don’t have either mozzarella or goat cheese in the house, you can use an equal amount of cream cheese.  And if you are already planning your Thanksgiving menu, this is a terrific vegetarian main dish accompanied by or spooned into 1/2 roasted acorn squash*. 

Savory Corn and Cheese Pudding
Serves 4

Ingredients
1 1/2 cups corn (fresh, frozen or 14-oz can low sodium corn)
1 egg
1/2 cup cream or whole milk
1/2 cup cheddar cheese, grated
3 ounces mozzarella or goat cheese,  diced (or a mixture)
1/4 cup fine cornmeal mixed with 1/2 teaspoon baking powder
dash cayenne (more for spice loving families)
1/2 teaspoon honey
salt and pepper
2 tablespoons freshly grated Parmesan cheese

Method
  1. Preheat oven to 375˚F.  Spray four 1/2 cup ramekins or one larger baking vessel with oil.  
  2. Puddings will be baked in a water bath (bain marie) by placing the ramekins in a high-sided balking dish filled about 3/4 inch with hot water.  Begin bain maire by boiling 2 cups water over medium heat while you prepare puddings. 
  3. Drain corn if using canned corn. Reserve 1/2 cup corn and the Parmesan cheese.  
  4. Place remaining ingredients in a small food processor or blender.  Blend together to break down corn and incorporate the cheese. 
  5. Add reserved 1/2 cup corn and blend briefly just to incorporate into batter.  
  6. Spoon into prepared ramekins of baking dish.  Sprinkle with grated Parmesan cheese.  
  7. Place puddings in the baking pan.  Place pan in oven, then fill 3/4 inch high with water to surround baking vessels.  To prevent spilled water, it is often easier to pour the water in once the baking pan is in the oven with the rack pulled out a bit.  Then slowly slide the rack back into the oven and bake.  (You can also add water to the pan then transfer it to the oven with steady hands.)  
  8. Bake puddings 20-30 minutes, until centers are set.  Serve immediately.
Corn and Cheese Puddings keep well covered in the refrigerator for 1-2 days

*For roasted acorn squash, rub halved squash interiors with a bit of olive, salt and pepper and roast flesh side down for 20 minutes at 375˚F.  Turn over and continue roasting until fork tender, another 15-20 minutes.  To sweeten,  add a few drops of maple syrup or some brown sugar with a dab of butter into cavity after turning. 

Tip: If you are using canned corn, a 14 ounce can drained is just a little over 1 1/2 cups.  Use it all.

Wednesday, October 19, 2011

Bacon!

A little bacon goes a long way but it is a bit messy and time consuming, even for a few pieces.  Store-bought precooked bacon that can be reheated by the piece in the microwave or oven has solved the fuss but most cost twice as much as uncooked bacon per ounce.

For a large breakfast party, experienced cooks and chefs know to cook a large batch of bacon in the oven freeing up stove space for eggs and pancakes.  The same technique can be used by smaller households to precook bacon and reheat when needed.  Here’s how it works:

Precooked Bacon
Ingredients
1 package uncooked bacon

Method
  1. Place uncooked bacon strips on a rimmed baking sheet.  
  2. Place in a cold oven.  
  3. Turn the oven to 450˚F and set timer for 15 minutes.  
  4. Check on bacon about 10 minutes in and turn. After 15 minutes use tongs to place bacon strips on paper towels to drain. 
The bacon should not be too crisp since it will crisp up upon reheating.  Use another paper towel to blot grease from tops side of bacon.  Store cooked bacon between waxed paper sheets and in a resealable plastic bag.  Freeze up to 3 months or refrigerate for 3-4 days.

To use, remove strips and heat in microwave 30 seconds or in a warm oven until heated through.

If you normally cook bacon in a microwave you can use this same idea to cook a large batch so that reheated strips do not create a puddle of grease.

Notes: any bacon brand is fine but I have found that thinly cut bacon is harder to handle so I look for a medium or thicker cut. 

Favorite Uses for Precooked Bacon
Real bacon bits for salads and baked potatoes
Cobb Salad
BLTs with avocado
Chicken salad with bacon (hold the salt)
Breakfast open-face bacon and cheese melt sandwich
Spaghettie Carbonara (eggs, cheese and bacon)
Baked beans with bacon

Leftover Uncooked Bacon
Sometimes not all the bacon in the package will fit in your pan.  You can use two pans or since stew season is coming on, cut uncooked bacon into 1-2" pieces and freeze.   When a stew recipe calls for sautéing onions or carrots, add a bit of the uncooked bacon “lardons” to help develop a deeper flavor in your dish.  Great for baked beans from scratch too.

Tuesday, October 11, 2011

Carrot Coconut Bran Muffins

The muffin pan has been out recently to make Breakfast Egg Cups for the weekdays.  The weekend is calling out a different tune: bran muffins with carrot cake overtones.  I extracted from a few favorite bran muffin recipes to make this low fat version and then added my favorite extras- grated carrot, coconut, raisins and walnuts.  For you, these can be plain bran muffins or add blueberries or dried cranberries and almonds, or even some banana  chunks (1 small banana) and chopped peanuts.

Carrot Coconut Bran Muffins with Walnuts and Raisins

Makes 12 regular muffins
Ingredients
1 cup unprocessed (miller's) wheat bran
1 1/3 cup white whole wheat four (or half all purpose, half whole wheat flour)
2/3 cup whole wheat flour (spoon into a measuring cup and level top)
1 1/4 teaspoons baking soda
1/2 teaspoon cinnamon
1/8 teaspoon salt
1/2 cup grated carrot
1/2 cup raisins
1/4 cup coconut
1/2 cup chopped walnuts
1 1/4 cups low-fat or skim milk
2 teaspoons apple cider vinegar
1/3 cup sugar
1/4 cup unsweetened applesauce
1 large egg
2 tablespoons canola oil
1 teaspoon vanilla extract


Method
  1. Preheat to 350°.  Lightly spray twelve regular size muffin cups with oil. 
  2. In a medium bowl, combine bran, flours, baking soda, and salt.  
  3. In a small bowl combine grated carrots, raisins, coconut and walnuts.
  4. In another medium bowl, whisk together the milk, vinegar, sugar, applesauce, egg, oil and vanilla. 
  5. Add the carrot mixture to the dry ingredients and combine thoroughly with a spoon or your (very clean) hands.  Make a well in the center of this dry mixture, and pour in the liquid mixture. Using a spoon, stir just until combined. Spoon the batter equally among the prepared muffin cups. Bake until the tops spring back when pressed gently in the center, about 18-20 minutes. Cool in the pan on a wire rack for 5 minutes before removing from the cups. Enjoy immediately or cool completely on the rack.  Cooled muffins can be stored in an airtight container 2 days or placed in plastic bags and frozen for up to 2 months.
These are moist so yo can enjoy them plain or, to bring our the carrot cake lurking inside, dab yours with a little softened cream cheese.

Wednesday, October 5, 2011

Pie Dough Samosas

Samosas are an appetizer from India.  Triangular dough pockets are filled with mild mixture of cooked potatoes and peas and are served with yogurt based sauces like cucumber raita or mint chutney for dipping.  When you order samosas at Indian restaurants they are fried.  At home, you can make these with pie dough and bake them, avoiding the fryer. The difference is subtle and your stomach will thank you because it’s hard not to eat a bunch of these. 

One complete recipe for pie dough (top and bottom) will yield 10-12 samosas.  You can use a prepared pie dough from the store if you are not a regular on the baking scene.  The triangles are formed from 5" rounds cut out from rolled out dough.  I use a small bowl—about 5 inches across as my template.  The potato and pea filling can be very mild or a spiced up curry version.  Cooked cauliflower can be mixed in or replace the potatoes.  Cooked sweet potatoes, butternut squash or pumpkin can also be used and are really fun around Halloween and Thanksgiving.  Here’s how:


Pie Dough Samosas
Makes 10-12 pieces. Serving size: 3 samosas
Pie dough-enough for 2 12-14 inch discs rolled out

Filling
1 tablespoon canola
1/2 white onion
4 medium boiling potatoes, peeled , boiled and diced
1/2 cup frozen peas
1 tablespoon fresh ginger, grated
1-3 teaspoons curry powder*
1/2 cup water
egg wash (1 egg mixed with 1 tablespoon water.

Method
  1. Heat oil in a large skillet over medium-high heat.  While oil heats, peel and chop onion.  
  2. Saute onion in oil until it is tender and just beginning to color.  
  3. Add cooked potatoes,  frozen peas, curry powder and water.  Stir to combine.  Lower heat and cover partially.  Cook down,  about 3 minutes until peas are heated through and potatoes have soaked up curry mixture.  
  4. Remove cover and continue to cook on low until the sauce is thickened and coats vegetables.   Remove from heat and allow to cool to room temperature before proceeding. (Filling may be prepared ahead and chilled overnight.)
  5. Preheat oven to 425˚F.  
  6. To make samosas, roll out pie dough to 1/8 inch thickness.  Use a small bowl or 5”diameter round cookie cutter to cut out 4 rounds from each disc.  Knead leftover dough together and place in refrigerator to keep chilled.  
  7. Place a scoop (2-3 tablespoons) of the cooled filling in the center of each round.  Paint the edges with egg wash and bring up the sides of each dough circle from 3 sides so they meet at a point at the top.  Press together the dough along the three seams.  It is fine to leave a small opening at the top to allow steam to escape when baking.  
  8. Place samosas on a baking sheet as they are made.  Roll out the remaining dough to get 2-3 more round discs.  When samosas are assembled, you may leave them plain or paint them with leftover egg wash to help the dough brown.  
  9. Bake at 425˚F for 18 minutes, until dough is cooked. 
  10.  Serve immediately or cool and refrigerate overnight.  Reheat in a 400˚F oven for 15-20 minutes. 
Serve samosas with Indian condiments including mint or mango chutney, hot sauce and cooling yogurt raita.

To make Raita:
1 cup plain yogurt  (whole, low-fat, nonfat or Greek are all OK)
1/4 cup grated cucumber (peel cucumber if not waxed)
1/2 teaspoon cumin (start with a 1/4 if you are not used to Indian foods)
1/8 teaspoon salt, coriander and mint
Stir it all together and let sit about 30 minutes for herbs and spices to blend.

Raita is one of those things you can really customize to suit your tastes.  With samosas you are going for a cooling effect but if your tastes veer toward spicy, you can add grated onion, a bit or fresh garlic, cayenne, etc.

*Curry Powder
In my Massaman Curry  (Three Curries, March 1, 2010) I discuss curry blends and how to make your own.  For samosas you can use a blend sitting on your shelf or make it fresh. To make your own for this recipe combine: 1 teaspoon tumeric, 1/4 teaspoon cumin, 1/8 teaspoon each cayenne, oregano, paprika, cinnamon.  To make this spicy, add a good pinch of cayenne.

Friday, September 30, 2011

Egg Cups To Go

Somewhere between a crustless quiche and a Spanish tortilla, Breakfast Egg Cups are a simple make-ahead meal for the morning.  They even freeze well so you can make a double batch for the week.

A lot of us who need to use our brains for anything during the day agree that breakfast must include a lean protein and some tasty low-carb ingredients.  Because you can make them ahead, reheat them in a microwave or pack them for a commute, Breakfast Egg Cups are a pure solution and really nice if portion size or calorie conscious eating is on the menu. 

There are as many filling variations as there are omelette ideas.  If you are really determined about calories this fall, you can substitute all or part of the whole eggs in this recipe with egg whites and stick with vegetables like spinach, zucchini, mushrooms and asparagus and meats like Canadian bacon rather then the higher carb/fat options.  You can use low fat cheeses or cottage/ricotta cheese as well. 

At other times, you might like combinations like potato-chorizo-manchego cheese, asparagus-blue cheese-bacon or smoked gouda-mushroom-sausage. It almost sounds like party fare.  In fact, if you bake a batch in mini-muffin tins rather than the regular muffin pans here, you have a very nice hot hors d’oeuvre for last minutes guests.

Breakfast Egg Cups
Makes 6 cups, one serving equals 2 egg cups
Ingredients
3 eggs
1/4 cup milk
1/4 cup freshly grated Parmesan cheese
3/4 cup cooked chopped vegetables (zucchini, spinach, asparagus, potatoes)
optional: up to 2 tablespoons extra cheese (blue, cheddar, swiss, havarti, smoked gouda, goat cheese) and/or 2 tablespoons cooked diced bacon, chorizo sausage, Canadian bacon

Method
  1. Preheat oven to 350˚F.  Lightly spray muffin tins with oil. (You may use lightly sprayed paper liners.) 
  2. Break eggs into a small mixing bowl and mix well.  
  3. Add remaining ingredients and spoon into 6 muffin tins.  Fill any empty cups 1/4 full with water to prevent burning.)
  4. Bake 15 minutes, until eggs are set.  As with quiche, you can remove them to cook when the centers are still a little loose.
These are easy to take along as is or packed in a warm roll.  

Thursday, September 22, 2011

Spinach Artichoke Dip Pasta

This is just about everyone’s favorite cheesey-vegetable dip and combining it with pasta seemed like a natural.  When I could not find a version online, I created my own with fettucini, mushrooms and chicken. Omit the chicken to make this a vegetarian entrée or serve chicken on the side for a mixed crowd. The dip heritage makes this appealing comfort food for early fall when there’s homework to be done and a cool night ahead.

Spinach-Artichoke Dip Pasta with Chicken
Ingredients
1 bag fresh spinach (not baby spinach) or 1 package frozen
1 can quartered artichoke hearts
1/3 cup mayonnaise*
1/3 cup sour cream*
2 ounces cream cheese*
1/2 cup shredded cheese: havarti or cheddar*
1/4 cup freshly grated  parmesan cheese
1/3 cup slivered almonds
8 ounces dried fettucini, cooked
1 cup sautéed mushrooms
2 boneless skinless chicken breasts (cooked and cubed)

Method
  1. Preheat oven to 350˚F.  
  2. Remove tough stems from mature spinach leaves and steam until just wilted.  Drain and roughly chop.  If using frozen spinach, defrost and drain thoroughly before chopping.  Placed spinach in a large mixing bowl.  
  3. Drain artichokes and chop any very large pieces.  Add to bowl with spinach.  
  4. Stir in mayonnaise, sour cream, cream cheese and shredded cheddar or havarti.  Add sautéed mushrooms, hot pasta and chicken.  
  5. Mix with a gentle hand and transfer mixture to a large casserole dish lightly sprayed with oil to prevent pasta from sticking.  Sprinkle grated parmesan, then almonds over the top.  
  6. Bake 20-30 minutes at 350˚F until casserole is piping hot and almonds are lightly toasted.  (If topping is browning too fast, loosely cover dish with aluminum foil until center of casserole is heated through. 
This casserole freezes well.  Bake as directed before cooling and freezing.  To reheat, bake loosely covered at 325˚F for 45 minutes until internal temperature of 160˚F.  Remove cover and bake another 10-15 minutes to crisp top.

*You may use light or reduced calorie versions of these ingredients.

Saturday, September 17, 2011

Chipotle Potato Salad

Say good-bye to summer with a potato salad that carries a hint of fall.  To the white potatoes that are abundant at farmers markets now, add sweet potatoes (and purple Peruvian ones if you see them).  In fact, you can make this with all sweet potatoes, which were the inspriration for this recipe.  A simple mayonnaise-based dressing gets fall color from sweet, smoky and spicy chipotle chili peppers.

Chipotle Potato Salad
Ingredients
1 1/2 pounds potatoes—white, sweet and/or purple
2/3 cup mayonnaise
1/4 cup sour cream
8-10 chipotle chili peppers in adobo sauce, seeded and minced
Juice of 1/2 lime
1 tablespoon red wine vinegar
1/4 teaspoon salt
dash coriander

Method
  1. Boil the potatoes whole until cooked through.  Cool. When cool, peel and cube.  Place in a large mixing bowl.  
  2. In a small bowl, combine remaining ingredients and taste.  Add more chipotle peppers if you’d like the potato salad extra spicy.  Cool things off with an additional squeeze of lime.  
  3. Add dressing to potatoes and gently toss to enrobe all the potatoes.  
  4. Refrigerate at least an hour to allow flavors to permeate.

Friday, September 9, 2011

No Fuss Granola; Pure & Simple

Even though granola sounds healthy some store bought versions include some iffy ingredients or need some processing to be shelf stable. Homemade granola can be so simple and this no fuss version uses just a few pantry items. Fewer ingredients not only gives you a pure flavor, its saves time so you will make your own granola more often.  Here’s our honed down version with our favorite flavors.  It used to have twice the number of ingredients and we think it tastes better pared back.

No Fuss Granola
Ingredients
3 cups rolled oats (not instant)
1/3 cup each wheat germ, coconut, sliced almonds
1 teaspoon cinnamon
1/8 teaspoon salt
1/3 cup each vegetable oil, maple syrup
1 teaspoon vanilla extract
post-bake add ins: 1 cup dried fruits including raisins, cherries, chopped apricots or figs, etc

Method
  1. Preheat oven to 300˚F.
  2. In a large bowl, combine dry ingredients (oats through salt) and stir to combine thoroughly.  
  3. Add liquid ingredients: oil, maple syrup and vanilla.  Stir to coat all dry ingredients.  (You may use your very clean hands).  
  4. Pour granola mixture onto a rimmed baking sheet and spread out evenly.  Bake a total of 25-30 minutes until oats are crisp and lightly browned.  Check and stir mixture halfway through cooking to gauge progress.  
  5. Cool cooked granola and, once cool, add dried fruit.  Store in an airtight container for up to two weeks. (It won’t last that long.) 

Your No Fuss Granola
Toasted coconut and almonds spiked with vanilla and cinnamon flavor our favorite granola.  Make substitutions for these ingredients slowly to find your favorite yet still pure flavor profile.  Oat flakes aren’t the only grain – try wheat or rye flakes or a five-grain flakes mixture as your base.  If you don’t like coconut, skip it and add sunflower or sesame seeds.  Try replacing the almonds with other nuts like walnuts, chopped hazelnuts, peanuts or even pepitas (hulled pumpkin seeds).  Almond extract is an alternative to vanilla and nutmeg, ginger or cardamon can stand in for cinnamon.  After baking add tropical dried fruits from mangoes and pineapple to banana chips and papaya.  Some households I know will try a chocolate chip version.  :)  And others will experiment with cayenne or chai spices.  Let me know how that goes.

Tuesday, August 30, 2011

Pan Bagnat


Salade Nicoise is pretty terrific on its own but let me clue you in right now.  You will want leftovers.  The second recipe is Pan Bagnat, the sandwich version of Salade Nicoise that I first tasted from a food cart near Nice's stony beach.  When I make Pan Bagnat, I am going for that late-summer memory of olive oil and vinegar-soaked bread packed with tuna, egg, anchovy, sweet red onions and the famous olives de Nice. 

Some of you are already thinking you will omit the anchovy.   I beseech you to try it or at least drizzle some of the unctuous oil onto your tuna.  It is a salty match for the other ingredients.  In fact, there is no added salt in this recipe since both the anchovy and olives provide the right amount.

I like to arrange it so that if I am serving Salade Nicoise for dinner then bringing Pan Bagnat on a hike or to the beach I get slightly different flavor profiles.  Both are from the area of Nice along the southern cost of France where the famous olives de Nice abound.  The salad will feature all the basic ingredients while the sandwich gets a little more individual with possible additions of marinated artichoke hearts, sliced red onion, even fava beans if they are in season near you. 

If you can get your hands on olives from Nice and some French olive oil, by all means use them in this recipe.  If you are putting this together from your local supermarket, Kalamata olives and a good extra virgin olive oil will do nicely. The recipe is fine with either canned or grilled tuna but if using canned, get the kind packed in olive oil.  Also, insist on a really good crusty loaf of bread to make the sandwich.  I use a crusty roll I make in my bread machine that we also use for hamburgers.  A baguette or a small boule will suit.  If there is a lot of bread between the crusts, its advisable to tear out a bit so there is room for all the fillings.

Salade Nicoise makes a knock-out grilled dinner salad for a large or small party.  Most of it can be prepared ahead and guests get to create their own salads from the ingredients offered so it’s a great recipe for a crowd with varied tastes.  It is best served at room temperature with the grilled tuna coming right to the table.  Individual plates are nice for a small number.  For a large group set up big platters so that guests can serve themselves the items they enjoy best.

Salade Nicoise
Per person quantities
1 cup torn lettuces (romaine, bibb, spinach leaves, etc.)
2 new potatoes, boiled
1/2 cup haricots verts (or green beans), steamed
1/2 ripe tomato
1 hard boiled egg
1/3 pound tuna steak, about 1 inch thick*
Ground black pepper
6 pitted olives (nicoise, kalamata,etc.)
3-4 anchovies packed in oil
Vinaigrette (recipe below)

*if using canned tuna, plan on 1/2 can per person and skip grilling step.  When ready to serve salad arrange tuna, olives and anchovy alongside vegetables. 

Method
  • Slice vegetables and egg.  Leave beans whole.  
  • Arrange vegetables on plates or platters starting with a layer of lettuce.  Arrange remaining vegetable ingredients and sliced egg (except olives and anchovies) in clusters to create a colorful tableau.  Leave room for the tuna.  This step may be done ahead of time and salads can be covered and refrigerated 1-2 hours.  
  • When ready to serve, heat grill or grill pan over medium-high heat and coat tuna steaks with coarsely ground pepper.  Lightly oil grill and cook tuna about 2-3 minutes per side for medium-rare.  
  • When fish is ready, remove fish to a separate platter and let sit 3-4 minutes.  
  • Slice tuna steaks in thick slabs and place alongside the vegetables. Garnish with olives and anchovies.   Serve with vinaigrette (recipe below).
Pan Bagnat
for 1 sandwich:
baguette or hard roll
1/2 portion of Salade Nicoise
Roasted red pepper
Marinated artichoke hearts
Red onion
Basil
Vinaigrette (recipe below)

Method
  1. Split the bread in half and brush an ounce of vinaigrette onto the open halves.  
  2. Next layer the Salade Nicoise leftovers with the remaining ingredients drizzling a bit more vinaigrette in between the layers. 
  3. Tightly wrap sandwich in plastic or wax paper and place in a second protective bag or resealable plastic bag.  Get thee to the beach or park to enjoy.   

La Vinaigrette
4 ounces extra virgin olive oil
1 ounce apple cider or red wine vinegar
Salt & pepper
Additions: Dijon mustard, capers a spoonful of pesto sauce

Vigorously mix all ingredients together. 


A recipe for Pan Bagnat direct from Nice (en francais) that is not too different than mine….

Sunday, August 21, 2011

Peach Cava

 
While peaches are still in season, we made peach ice cream and used some of the extra peach puree in an aperitif.  A tablespoon in a flute looks pretty topped with Cava, Spain's sparkling wine.  To make this without the ice cream step, peel, pit and puree or mash a ripe peach. Add a squeeze of lemon and a teaspoon each of peach schnapps (or vodka) and superfine sugar. 

How to Peel a Peach
Peeling a peach is easy and fast.  Once you learn this technique, you can use it for tomatoes too.
  1. Wash peach.
  2. Determine amount of water the peach will displace by placing it in a small, high-sided pot and covering the peach with cold water.  Remove the peach and boil the water over high heat.
  3. While water boils, score the bottom of the peach in a cross pattern.  Be sure to cut through the skin.
  4. When the water boils, turn the heat to medium and submerge the peach using a slotted spoon.
  5. Cook 30 seconds and removed peach with slotted spoon.
  6. Submerge peach in a bowl of ice water for 30 seconds.
  7. Remove the peach from the ice water and peel the loosened skin from the peach starting with the edges of the cross you cut at the bottom.  Skin will peel off easily.  

Sunday, August 14, 2011

Grilled Salmon with Peach-Bourbon Salsa

Peaches are in season in most areas of the country now. Combined with another American classic, bourbon, they move from the dessert course to the main course.  Bourbon is the “secret” ingredient in this recipe.  It takes the place of oil in the salsa and balances out the any tartness in your peaches and the salsa's lime juice.  Served over salmon steaks, this is another twenty minute summer supper.

Grilled Salmon with Peach-Bourbon Salsa
Serves 2
2 1-inch salmon steaks
2 tablespoon honey
2 tablespoon lime juice
1 tablespoon bourbon
2 teaspoons chopped parsley
salt & pepper
1 large peach, pitted and diced

Method
  1. Place salmon steaks in a shallow dish.  In a small bowl, mix together honey, lime juice and Bourbon.  
  2. Pour half of the mixture over salmon steaks and turn steaks to coat.  Let salmon soak up marinade while grill heats (or broiler preheats).  
  3. If grilling, brush a small amount of oil onto grill to prevent sticking.  Grill salmon steaks over medium-high heat fairly close to the heat source (no more than 4 inches) about 3-5 minutes on each side.  Salmon should be tender in center.  (If broiling, place rack at highest level and broil10 minutes total, turning once.) 
  4. While salmon cooks, prepare salsa.  Combine reserved marinade with parsley, salt and pepper and diced peach.  Serve over salmon steaks. 

Peach Tips
Thawed frozen peaches can be used in this recipe.  If fresh peaches are in season, use them peeled or unpeeled.  If you’d like to peel them, cut a small cross at the bottom of the peach and plunge into boiling water for 30 seconds.  Remove the peach with a slotted spoon and run under cold water.  When peach is cool enough to handle, peel off the skin starting with the scored skin at the bottom.

Tuesday, August 2, 2011

“Oven Fried” Eggplant

Crispy on the outside and a bit puffed up and creamy on the inside.  Eggplant does not need to be fried in order to get the taste and texture just right.  In fact, eggplant is such an oil absorber roasting at a high heat can actually give you better results than frying. This recipe is easy enough to make and enjoy on a weeknight.

High heat is the key to light and pure breaded eggplant slices. Turn up your oven to 450˚K and give it time to preheat.  This is true roasting temperature.

"Oven Fried" Eggplant
Preheat oven to 450˚F.
Slice one eggplant in 1/2 inch slices.  (You can peel eggplant or leave the attractive purple skin on or partially peeled).  Expect 9-12 slices.
Set up 3 shallow dishes for breading and use spray oil to prepare a heavy baking sheet.

Breading
Dish #1
1/2 cup flour + 1//4 teaspoon salt

Dish #2
1 beaten egg + 2 oz milk +1 oz water

Dish #3
1 cup fresh bread crumbs + 1/4 teaspoon each dried oregano, dried basil, black pepper, salt and parsley
(1 cup dried breadcrumbs can be substituted.)

Method
  1. Dip each slice in flour mixture and shake of excess.  The purpose of flouring the eggplant is to provide a dry surface for the egg wash and a thick layer of flour is not necessary.  
  2. Next dip the eggplant slice in the egg mixture and finally coat each side with the crumb mixture.  Place slice on oiled baking sheet.  
  3. Repeat with remaining slices and roast eggplant in a 450˚F oven for 15 minutes.  
  4. Turn slices over and roast an additional 5 minutes.  
  5. Serve as is or spoon a small amount of marinara sauce on each slice and top with mozzarella cheese.  Return to oven for 3-4 minutes until cheese melts.  Eggplant slices can be used in any eggplant Parmesan recipe.


Eggplant Tips
When buying eggplant, follow the general rule for all vegetables and fruits, that is, pick ones that are heavy for their size.  This indicates freshness via the presence of moisture inside.

Many people salt sliced eggplant and let it sit in a colander about an hour to draw out any bitterness.  This step also helps the eggplant resist too much oil absorption and is more important with older specimens.  I skip this step when the eggplant is at its peak freshness and because I won’t be frying it, I don’t have the oil absorption problem.


Post Script: Thankful to my Dad tonight for his enthusiastic approach to new foods throughout his travels. They taught him about the people of the world through sharing a meal together.

Friday, July 29, 2011

Summer Chicken Cacciatore

Most chicken cacciatore recipes take 45 minutes to an hour or more and go better in cooler weather.  This lighter version is for summer nights and takes less than half an hour, 20 minutes if you aren’t chatting with a loved one too much.  Well, if the loved one is helping to chop the vegetables, maybe 20 minutes is right. 

Chopping and sautéing the vegetables take the first 10 minutes while the water for the pasta heats.  The second 10 minutes is devoted to creating a sauce with the skillet vegetables and steaming chicken breasts topped with cheese in that sauce while the pasta cooks.  The lighter sauce is made from fresh tomatoes and vegetable juice.  The result is flavor that remains "summer garden" pure.  If you can get most of the ingredients out of your garden or at the farmers market, you will really appreciate the difference this lighter touch brings to a classic, especially if you have fresh herbs and freshly picked tomatoes.

Summer Chicken Cacciatore
Serves 4

Ingredients
1 tablespoon olive oil
1/2 sweet onion (Vidalia), sliced
4 small sweet peppers (or one large red pepper), seeded and sliced
1 cup mushrooms, sliced
4 carrots, peeled and sliced
2 celery stalks, sliced
2 large tomatoes, diced including liquid
2 cups tomato-based vegetable juice (Knudson’s Very Veggie organic or V-8 juice)
1 teaspoon dried oregano (1tablespoon fresh)
1/2 teaspoon dried thyme (3-4 springs  fresh)
1/2 teaspoon dried basil (3-4 chopped leaves fresh)
1/4 teaspoon black pepper
Salt to taste (may need 1/2 teaspoon salt if using a low-sodium vegetable juice)
8 oz uncooked, dried pasta (whole wheat rotini or penne are nice and cook in about 8-9 minutes)
4 5-oz chicken cutlets (Try Perdue Perfect Portions for this quick dish or pound larger breasts flat so that they will cook in 10 minutes.)
4-6 thin slices mozzarella cheese
1 cup steamed fresh spinach
optional: 1/3 cup chicken broth, white wine

Method
  1. In a large pot, begin to heat salted water to boiling for the pasta.  
  2. Heat olive oil in a large skillet that has a cover (to be used later in recipe). 
  3. Add onion, peppers, carrots and celery and sauté until they are crisp-tender.  
  4. Add tomatoes and their juice plus vegetable and herbs.  Stir to coat and add broth or wine (or water) if desired.  There should be enough liquid to cover vegetables completely. Lower heat and cover for 2-3 minutes to combine flavors.  
  5. Remove cover and allow to cook down a bit while you add pasta to the (now) boiling water. 
  6. Add chicken breasts to skillet, laying them out over the vegetables.  Cover skillet to allow chicken to steam over sauce for about 5 minutes.  
  7. Uncover and turn chicken over.  Place a slice or two of cheese on each breast and cover with lid.  Allow chicken to cook additional 4-5 minutes until cooked through ant at least 165˚F.  
  8. When pasta is ready, drain and reserve about 1/2 cup pasta liquid.  
  9. Remove chicken from skillet to a warm platter (or directly to plates) while you finish the pasta dish. 
  10. Mix pasta and steamed spinach into the vegetable sauce.  Add a bit of pasta water if sauce has thickened too much: it should not stick the vegetables to each other.  
  11. Serve pasta alongside chicken breasts.

Friday, July 22, 2011

Foraging for Chanterelle Mushrooms

Nothing suits the pure foods mantra like the foods we gather ourselves.  Last week my brother took me to a few of his secret spots in Vermont for chanterelles.  These are the gold-orange mushrooms that look like open parasols from below with gills reaching down the stem.  Not technically gills, but to us amateurs very similar. 

Speaking of amateurs, it’s smart to go mushroom hunting with an expert, preferably a regular forager for the particular mushroom you are searching out.  Matthew has taken me before but I still needed a refresher on identifying them and he checked my basket as we went along.  The more you see them, the easier they are to identify.   Most wooded areas can sustain chanterelles and in Vermont they can pop up seemingly overnight from late spring into September. We had luck at the base of pine and beech trees and along the length of fallen, decomposing trees. 

The forager’s attire and equipment list is short: long plants and shirt to discourage bugs, closed toe shoes to step through the forest’s uneven floor, an optional brimmed hat to protect eyes and face if you like to crash through underbrush, a basket for your finds and a pen knife to cut the stems cleanly. 

At home, Matthew used a dedicated paintbrush to clean our chanterelles.  Now the hard part—to enjoy that evening sautéed in butter over pasta or the next morning in omelettes?  The flavor of a chanterelle is delicate so it pairs well with noodles and eggs.  Don’t be tempted to add many more ingredients or the flavors will overpower your chaterelles.  Potatoes, poultry and seafood also provide a nice match for chanterelles.

Restaurants pay about $20 per pound, nice if you are hitting a gold rush of chanterelles but not a sustainable living.  (Mushrooms are light.)  Still, its nice to know the going rate so you can pat yourself on the back while enjoying a delicacy sought by chefs and diners at multi-star establishments.

Cleaned chanterelles store well in a paper bag in the refrigerator and can be frozen (uncooked) to use within 3 months.  To freeze, lay whole mushrooms on a small baking sheet and place in the freezer.  When mushrooms are frozen, in about 2 hours, place them in a re-sealable plastic bag marked with a use by date.
We decided on open-face chanterelle omelettes with a side of goat cheese.

Friday, July 15, 2011

Behold, the Simple Egg

A perfectly cooked hard boiled egg with a just set yolk and a white that is easily held in hand or chopped to create the perfect deviled egg or egg salad is easy to achieve but takes getting to know your equipment.  Every chef has the timing down but that doesn't mean it will work on your stove, in your favorite pot and in the temperature of your tap water.  Try my basic 6-6-6 technique and adjust to our kitchen's timing:
  1. Place eggs straight from the refrigerator in a pot, covered with cold tap water, top on the pot.  
  2. Place the pot over high heat and bring to a boil.  
  3. Once water is boiling, lower heat and place the top askew so that a slow boil is maintained for 6 minutes.  
  4. After 6 minutes, remove from burner and let eggs sit in hot water an additional 6 minutes.  
  5. Drain and fill pot with cold water.  (If you are cooking more than 3 eggs,  rinse a few times to ensure water surrounding eggs is cool.)  
  6. Let eggs sit in cold water 6 minutes.  Peel and store or enjoy immediately.
Hard boiled eggs don't need to be ice cold to enjoy.  If you are using right away on a chef's salad or a snack, try them while they are still warm.  Lovely.

Soft Boiled Egg Variations
Now that you can make a perfect hard boiled egg, here's how to make a soft boiled egg that is the perfect protein portion over a bed of steamed spinach or toast.  Fast for breakfast, satisfying for lunch, perfect for a light dinner.

Use the same technique as above but once the water begins to boil, remove the pot's lid, lower the heat and allow enough heat for a slow boil for 2 minutes.  Remove the egg with a slotted spoon and quickly run under cool water so you can handle the shell.  Over a bed of spinach or toast, use a knife to rap the egg's middle and open it up.  With a spoon scoop out the egg white allowing the yolk to ouze out like a thick sauce. A little salt and pepper completes the picture.

A raw egg (out of its shell) can also be placed in a ramekin or custard cup of hot steamed spinach, lightly covered and microwaved 35-45 seconds to create a poached egg effect. Slide it onto a broiled mushroom for an elegant first course.

Sunday, July 10, 2011

Elegant Life Leftovers: Gazpacho

This traditional cold soup made from favorite summer salad ingredients can do extra duty if you make enough for leftovers.  First we enjoyed the soup for dinner with grilled shrimp and a heavy garnish of chopped avocado and feta cheese (ricotta salata or even a semi-hard blue from Denmark would also be nice).

The next day we mixed some of the leftover soup into parboiled fresh corn kernels to create a cold summer corn salad perfect for a neighborhood picnic contribution.  You can make a fast and simple pasta salad by substituting your favorite shaped noodle (cooked) for the corn.  Be sure to schedule time for the pasta or corn mixture to cool in the fridge before it heads to the table or picnic. 


Pure Foods Project Gazpacho
Serves 4
Ingredients
1 medium cucumber, seeded (peel if waxed)
1 large tomato
1-2 garlic clove, peeled
1 large red bell pepper (we used 4 smaller multi-colored sweet peppers)
20-32 oz quart tomato-vegetable juice (low sodium V-8 or Knudson's Very Veggie organic)2 tablespoons chopped, fresh parsley
1 tablespoon olive oil
2 teaspoons red wine vinegar
Optional: squeeze of lemon or lime juice
Serving suggestions: 16 grilled shrimp (4 per person), 1/2 sliced avocado and 2 oz feta cheese chunks

Garnishes: chopped avocado, feta cheese cubes, grilled shrimp, day-old baguette slices

Method
  1. Roughly chop the cucumber, tomato and garlic and place in a food processor or blender.
  2. Use the pepper as is or roast it to a light char to impart a smokier flavor to your soup.  Either way, cut open and seed the pepper then roughly chop and add to other vegetables.
  3. Add 1/2 the juice and pulse or blend until vegetables are finely chopped but not pureed.
  4. Pour mixture in a large bowl or container and add remaining juice, parsley, olive oil and vinegar.
  5. Taste and add salt and pepper, lime juice and even hot sauce if your taste calls for it.  
  6. Cover and chill until serving time.
  7. Serve with grilled shrimp, avocado and feta.
Now add about a cup of the leftovers to some cooked corn or pasta (about 3-4 cups cooked) and enjoy a second time around.

    Wednesday, June 29, 2011

    Elegant Life Leftovers: Grilled Fish


    I've been spending a little time on a barrier island this month. Barrier islands are long and hug much of the eastern coastline protecting us from the harsher realities of Atlantic Ocean weather.  June is the best time to be on this island, before the mosquitoes arrive in droves, a pristine (aka unsprayed) section of our National Seashore.

    One of the things about true islands, the type without roads or stores, is that you have to have your food act organized. Recently we were gifted with a visit from friends Becky and Kimberly who boated over with halibut and swordfish steaks. Alongside came a fresh fruit salsa that served as a marinade and was later cooked in a pot while the fish grilled. (Normally we do not eat marinades that have touched meat, even if cooked.  Since this mixture is for fish and will be brought to a boil, it passes the safety test.) 

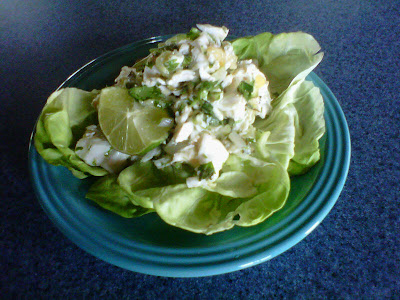
    The next day, leftover fish and salsa became the base of a fish salad with chopped celery, extra lime, more cilantro mixed with fresh mint and parsley and a dollop of mayonnaise. Serve on lettuce or in rolls.

    Two excellent meals. 

    Kimberly's Marinade
    Makes enough for about 2 pounds of fish steaks (Halibut, Swordfish, Tuna or Shark)
    1 chopped mango
    1/2 chopped sweet onion, like Vidalia
    1 bunch chopped fresh cilantro
    juice of 1 lime juice
    1/4 cup olive oil

    Method
    1. Place fish in a container that can be tightly covered.
    2. Combine all ingredients and pour over fish.
    3. Marinate up to 1/2 hour while grill heats (to medium)
    4. Gently remove fish steaks and place on grill. Grill about 4 minutes on each side.
    5. Meanwhile place marinade in a pot and bring to a boil.  Lower heat and simmer until onion is tender and salsa has begun to break down.
    6. Serve fish with a spoonful or two of salsa.

    Wednesday, June 22, 2011

    Steak Frites!

    Note the clever presentation of frites in flower pots lined with coffee filters.  Serve with mayonnaise as well as all American ketchup

    This French Bistro stand-by is within your reach and makes for a dinner party that is pure fun.  They key is simple ingredients served up with a little flair.  For a mini-reunion of high school friends (some of whom have know each other since kindergarten) there’s no need to impress, only to enjoy, which is how we approached this meal a few weeks ago.

    The menu is grilled steak, french fries and a glorious salad filled with all the season's best and most colorful favorites—garden lettuce, tomatoes, cucumbers, yellow peppers and red onions with a handful of freshly chopped herbs and a light vinaigrette dressing.  Baby spinach steamed in the microwave with shaved garlic and a douse of extra virgin olive oil completes the bistro meal. 
    Start off with a platter of cheeses and a freshly baked baguette and finish everything off with a bakery chocolate mousse cake or fruit pastries.  Guests who’d like to bring something can help with these courses or bring one of the many affordable French wines  on the market these days—red or white. 

    Select either individual boneless NY strip streaks or one large sirloin to serve six.  If you are still lucky enough to have a great butcher near you, ask for their advice.  Set the steaks out about 45 minutes before grilling and trim any large edges of fat to keep the fire in line.  There are plenty of sites to guide you if you need help cooking the steak.  My top advice—let the steak sit 8-10 minutes when it comes off the grill  to redistribute the juices while you place the finishing touches on the meal. 
    Use frozen french fries that are plain-plain-plain.  Just potatoes, oil and a bit of salt.  Follow the package directions to bake them at a high heat in the oven and time them to be ready when the steak is served (10 minutes past taking it off the grill).  Now just toss the salad with dressing and microwave your spinach for three minutes before tossing with some olive oil. 

    Sit down, enjoy.