Tuesday, August 2, 2011

“Oven Fried” Eggplant

Crispy on the outside and a bit puffed up and creamy on the inside.  Eggplant does not need to be fried in order to get the taste and texture just right.  In fact, eggplant is such an oil absorber roasting at a high heat can actually give you better results than frying. This recipe is easy enough to make and enjoy on a weeknight.

High heat is the key to light and pure breaded eggplant slices. Turn up your oven to 450˚K and give it time to preheat.  This is true roasting temperature.

"Oven Fried" Eggplant
Preheat oven to 450˚F.
Slice one eggplant in 1/2 inch slices.  (You can peel eggplant or leave the attractive purple skin on or partially peeled).  Expect 9-12 slices.
Set up 3 shallow dishes for breading and use spray oil to prepare a heavy baking sheet.

Breading
Dish #1
1/2 cup flour + 1//4 teaspoon salt

Dish #2
1 beaten egg + 2 oz milk +1 oz water

Dish #3
1 cup fresh bread crumbs + 1/4 teaspoon each dried oregano, dried basil, black pepper, salt and parsley
(1 cup dried breadcrumbs can be substituted.)

Method
  1. Dip each slice in flour mixture and shake of excess.  The purpose of flouring the eggplant is to provide a dry surface for the egg wash and a thick layer of flour is not necessary.  
  2. Next dip the eggplant slice in the egg mixture and finally coat each side with the crumb mixture.  Place slice on oiled baking sheet.  
  3. Repeat with remaining slices and roast eggplant in a 450˚F oven for 15 minutes.  
  4. Turn slices over and roast an additional 5 minutes.  
  5. Serve as is or spoon a small amount of marinara sauce on each slice and top with mozzarella cheese.  Return to oven for 3-4 minutes until cheese melts.  Eggplant slices can be used in any eggplant Parmesan recipe.


Eggplant Tips
When buying eggplant, follow the general rule for all vegetables and fruits, that is, pick ones that are heavy for their size.  This indicates freshness via the presence of moisture inside.

Many people salt sliced eggplant and let it sit in a colander about an hour to draw out any bitterness.  This step also helps the eggplant resist too much oil absorption and is more important with older specimens.  I skip this step when the eggplant is at its peak freshness and because I won’t be frying it, I don’t have the oil absorption problem.


Post Script: Thankful to my Dad tonight for his enthusiastic approach to new foods throughout his travels. They taught him about the people of the world through sharing a meal together.

Friday, July 29, 2011

Summer Chicken Cacciatore

Most chicken cacciatore recipes take 45 minutes to an hour or more and go better in cooler weather.  This lighter version is for summer nights and takes less than half an hour, 20 minutes if you aren’t chatting with a loved one too much.  Well, if the loved one is helping to chop the vegetables, maybe 20 minutes is right. 

Chopping and sautéing the vegetables take the first 10 minutes while the water for the pasta heats.  The second 10 minutes is devoted to creating a sauce with the skillet vegetables and steaming chicken breasts topped with cheese in that sauce while the pasta cooks.  The lighter sauce is made from fresh tomatoes and vegetable juice.  The result is flavor that remains "summer garden" pure.  If you can get most of the ingredients out of your garden or at the farmers market, you will really appreciate the difference this lighter touch brings to a classic, especially if you have fresh herbs and freshly picked tomatoes.

Summer Chicken Cacciatore
Serves 4

Ingredients
1 tablespoon olive oil
1/2 sweet onion (Vidalia), sliced
4 small sweet peppers (or one large red pepper), seeded and sliced
1 cup mushrooms, sliced
4 carrots, peeled and sliced
2 celery stalks, sliced
2 large tomatoes, diced including liquid
2 cups tomato-based vegetable juice (Knudson’s Very Veggie organic or V-8 juice)
1 teaspoon dried oregano (1tablespoon fresh)
1/2 teaspoon dried thyme (3-4 springs  fresh)
1/2 teaspoon dried basil (3-4 chopped leaves fresh)
1/4 teaspoon black pepper
Salt to taste (may need 1/2 teaspoon salt if using a low-sodium vegetable juice)
8 oz uncooked, dried pasta (whole wheat rotini or penne are nice and cook in about 8-9 minutes)
4 5-oz chicken cutlets (Try Perdue Perfect Portions for this quick dish or pound larger breasts flat so that they will cook in 10 minutes.)
4-6 thin slices mozzarella cheese
1 cup steamed fresh spinach
optional: 1/3 cup chicken broth, white wine

Method
  1. In a large pot, begin to heat salted water to boiling for the pasta.  
  2. Heat olive oil in a large skillet that has a cover (to be used later in recipe). 
  3. Add onion, peppers, carrots and celery and sauté until they are crisp-tender.  
  4. Add tomatoes and their juice plus vegetable and herbs.  Stir to coat and add broth or wine (or water) if desired.  There should be enough liquid to cover vegetables completely. Lower heat and cover for 2-3 minutes to combine flavors.  
  5. Remove cover and allow to cook down a bit while you add pasta to the (now) boiling water. 
  6. Add chicken breasts to skillet, laying them out over the vegetables.  Cover skillet to allow chicken to steam over sauce for about 5 minutes.  
  7. Uncover and turn chicken over.  Place a slice or two of cheese on each breast and cover with lid.  Allow chicken to cook additional 4-5 minutes until cooked through ant at least 165˚F.  
  8. When pasta is ready, drain and reserve about 1/2 cup pasta liquid.  
  9. Remove chicken from skillet to a warm platter (or directly to plates) while you finish the pasta dish. 
  10. Mix pasta and steamed spinach into the vegetable sauce.  Add a bit of pasta water if sauce has thickened too much: it should not stick the vegetables to each other.  
  11. Serve pasta alongside chicken breasts.

Friday, July 22, 2011

Foraging for Chanterelle Mushrooms

Nothing suits the pure foods mantra like the foods we gather ourselves.  Last week my brother took me to a few of his secret spots in Vermont for chanterelles.  These are the gold-orange mushrooms that look like open parasols from below with gills reaching down the stem.  Not technically gills, but to us amateurs very similar. 

Speaking of amateurs, it’s smart to go mushroom hunting with an expert, preferably a regular forager for the particular mushroom you are searching out.  Matthew has taken me before but I still needed a refresher on identifying them and he checked my basket as we went along.  The more you see them, the easier they are to identify.   Most wooded areas can sustain chanterelles and in Vermont they can pop up seemingly overnight from late spring into September. We had luck at the base of pine and beech trees and along the length of fallen, decomposing trees. 

The forager’s attire and equipment list is short: long plants and shirt to discourage bugs, closed toe shoes to step through the forest’s uneven floor, an optional brimmed hat to protect eyes and face if you like to crash through underbrush, a basket for your finds and a pen knife to cut the stems cleanly. 

At home, Matthew used a dedicated paintbrush to clean our chanterelles.  Now the hard part—to enjoy that evening sautéed in butter over pasta or the next morning in omelettes?  The flavor of a chanterelle is delicate so it pairs well with noodles and eggs.  Don’t be tempted to add many more ingredients or the flavors will overpower your chaterelles.  Potatoes, poultry and seafood also provide a nice match for chanterelles.

Restaurants pay about $20 per pound, nice if you are hitting a gold rush of chanterelles but not a sustainable living.  (Mushrooms are light.)  Still, its nice to know the going rate so you can pat yourself on the back while enjoying a delicacy sought by chefs and diners at multi-star establishments.

Cleaned chanterelles store well in a paper bag in the refrigerator and can be frozen (uncooked) to use within 3 months.  To freeze, lay whole mushrooms on a small baking sheet and place in the freezer.  When mushrooms are frozen, in about 2 hours, place them in a re-sealable plastic bag marked with a use by date.
We decided on open-face chanterelle omelettes with a side of goat cheese.

Friday, July 15, 2011

Behold, the Simple Egg

A perfectly cooked hard boiled egg with a just set yolk and a white that is easily held in hand or chopped to create the perfect deviled egg or egg salad is easy to achieve but takes getting to know your equipment.  Every chef has the timing down but that doesn't mean it will work on your stove, in your favorite pot and in the temperature of your tap water.  Try my basic 6-6-6 technique and adjust to our kitchen's timing:
  1. Place eggs straight from the refrigerator in a pot, covered with cold tap water, top on the pot.  
  2. Place the pot over high heat and bring to a boil.  
  3. Once water is boiling, lower heat and place the top askew so that a slow boil is maintained for 6 minutes.  
  4. After 6 minutes, remove from burner and let eggs sit in hot water an additional 6 minutes.  
  5. Drain and fill pot with cold water.  (If you are cooking more than 3 eggs,  rinse a few times to ensure water surrounding eggs is cool.)  
  6. Let eggs sit in cold water 6 minutes.  Peel and store or enjoy immediately.
Hard boiled eggs don't need to be ice cold to enjoy.  If you are using right away on a chef's salad or a snack, try them while they are still warm.  Lovely.

Soft Boiled Egg Variations
Now that you can make a perfect hard boiled egg, here's how to make a soft boiled egg that is the perfect protein portion over a bed of steamed spinach or toast.  Fast for breakfast, satisfying for lunch, perfect for a light dinner.

Use the same technique as above but once the water begins to boil, remove the pot's lid, lower the heat and allow enough heat for a slow boil for 2 minutes.  Remove the egg with a slotted spoon and quickly run under cool water so you can handle the shell.  Over a bed of spinach or toast, use a knife to rap the egg's middle and open it up.  With a spoon scoop out the egg white allowing the yolk to ouze out like a thick sauce. A little salt and pepper completes the picture.

A raw egg (out of its shell) can also be placed in a ramekin or custard cup of hot steamed spinach, lightly covered and microwaved 35-45 seconds to create a poached egg effect. Slide it onto a broiled mushroom for an elegant first course.

Sunday, July 10, 2011

Elegant Life Leftovers: Gazpacho

This traditional cold soup made from favorite summer salad ingredients can do extra duty if you make enough for leftovers.  First we enjoyed the soup for dinner with grilled shrimp and a heavy garnish of chopped avocado and feta cheese (ricotta salata or even a semi-hard blue from Denmark would also be nice).

The next day we mixed some of the leftover soup into parboiled fresh corn kernels to create a cold summer corn salad perfect for a neighborhood picnic contribution.  You can make a fast and simple pasta salad by substituting your favorite shaped noodle (cooked) for the corn.  Be sure to schedule time for the pasta or corn mixture to cool in the fridge before it heads to the table or picnic. 


Pure Foods Project Gazpacho
Serves 4
Ingredients
1 medium cucumber, seeded (peel if waxed)
1 large tomato
1-2 garlic clove, peeled
1 large red bell pepper (we used 4 smaller multi-colored sweet peppers)
20-32 oz quart tomato-vegetable juice (low sodium V-8 or Knudson's Very Veggie organic)2 tablespoons chopped, fresh parsley
1 tablespoon olive oil
2 teaspoons red wine vinegar
Optional: squeeze of lemon or lime juice
Serving suggestions: 16 grilled shrimp (4 per person), 1/2 sliced avocado and 2 oz feta cheese chunks

Garnishes: chopped avocado, feta cheese cubes, grilled shrimp, day-old baguette slices

Method
  1. Roughly chop the cucumber, tomato and garlic and place in a food processor or blender.
  2. Use the pepper as is or roast it to a light char to impart a smokier flavor to your soup.  Either way, cut open and seed the pepper then roughly chop and add to other vegetables.
  3. Add 1/2 the juice and pulse or blend until vegetables are finely chopped but not pureed.
  4. Pour mixture in a large bowl or container and add remaining juice, parsley, olive oil and vinegar.
  5. Taste and add salt and pepper, lime juice and even hot sauce if your taste calls for it.  
  6. Cover and chill until serving time.
  7. Serve with grilled shrimp, avocado and feta.
Now add about a cup of the leftovers to some cooked corn or pasta (about 3-4 cups cooked) and enjoy a second time around.

    Wednesday, June 29, 2011

    Elegant Life Leftovers: Grilled Fish


    I've been spending a little time on a barrier island this month. Barrier islands are long and hug much of the eastern coastline protecting us from the harsher realities of Atlantic Ocean weather.  June is the best time to be on this island, before the mosquitoes arrive in droves, a pristine (aka unsprayed) section of our National Seashore.

    One of the things about true islands, the type without roads or stores, is that you have to have your food act organized. Recently we were gifted with a visit from friends Becky and Kimberly who boated over with halibut and swordfish steaks. Alongside came a fresh fruit salsa that served as a marinade and was later cooked in a pot while the fish grilled. (Normally we do not eat marinades that have touched meat, even if cooked.  Since this mixture is for fish and will be brought to a boil, it passes the safety test.) 

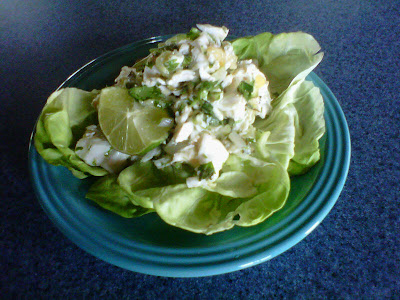
    The next day, leftover fish and salsa became the base of a fish salad with chopped celery, extra lime, more cilantro mixed with fresh mint and parsley and a dollop of mayonnaise. Serve on lettuce or in rolls.

    Two excellent meals. 

    Kimberly's Marinade
    Makes enough for about 2 pounds of fish steaks (Halibut, Swordfish, Tuna or Shark)
    1 chopped mango
    1/2 chopped sweet onion, like Vidalia
    1 bunch chopped fresh cilantro
    juice of 1 lime juice
    1/4 cup olive oil

    Method
    1. Place fish in a container that can be tightly covered.
    2. Combine all ingredients and pour over fish.
    3. Marinate up to 1/2 hour while grill heats (to medium)
    4. Gently remove fish steaks and place on grill. Grill about 4 minutes on each side.
    5. Meanwhile place marinade in a pot and bring to a boil.  Lower heat and simmer until onion is tender and salsa has begun to break down.
    6. Serve fish with a spoonful or two of salsa.

    Wednesday, June 22, 2011

    Steak Frites!

    Note the clever presentation of frites in flower pots lined with coffee filters.  Serve with mayonnaise as well as all American ketchup

    This French Bistro stand-by is within your reach and makes for a dinner party that is pure fun.  They key is simple ingredients served up with a little flair.  For a mini-reunion of high school friends (some of whom have know each other since kindergarten) there’s no need to impress, only to enjoy, which is how we approached this meal a few weeks ago.

    The menu is grilled steak, french fries and a glorious salad filled with all the season's best and most colorful favorites—garden lettuce, tomatoes, cucumbers, yellow peppers and red onions with a handful of freshly chopped herbs and a light vinaigrette dressing.  Baby spinach steamed in the microwave with shaved garlic and a douse of extra virgin olive oil completes the bistro meal. 
    Start off with a platter of cheeses and a freshly baked baguette and finish everything off with a bakery chocolate mousse cake or fruit pastries.  Guests who’d like to bring something can help with these courses or bring one of the many affordable French wines  on the market these days—red or white. 

    Select either individual boneless NY strip streaks or one large sirloin to serve six.  If you are still lucky enough to have a great butcher near you, ask for their advice.  Set the steaks out about 45 minutes before grilling and trim any large edges of fat to keep the fire in line.  There are plenty of sites to guide you if you need help cooking the steak.  My top advice—let the steak sit 8-10 minutes when it comes off the grill  to redistribute the juices while you place the finishing touches on the meal. 
    Use frozen french fries that are plain-plain-plain.  Just potatoes, oil and a bit of salt.  Follow the package directions to bake them at a high heat in the oven and time them to be ready when the steak is served (10 minutes past taking it off the grill).  Now just toss the salad with dressing and microwave your spinach for three minutes before tossing with some olive oil. 

    Sit down, enjoy.

    Saturday, June 11, 2011

    Freezer Waffles

    Waffles to eat now and a few more for the freezer.
    The best way to enjoy hot waffles is to be ready to eat them as they come off the iron.  Not great for the cook and no one eats together since waffles get gobbled up fast.  If you want to eat these right away but together, turn the oven on to 200˚F and slip cooked waffles onto a baking pan to keep warm while you finish the batch.  If you are making a big quantity, cover loosely with foil. 

    The next best way is to cool your waffles on racks and freeze them.  Reheat in a toaster, toaster oven or, for a quantity, a conventional oven preheated to 325˚F.

    Waffles irons vary and the first one is often a sacrificial lamb.  It goes to the cook who is doing all that work and must be hungry.  Our waffle iron takes about 1/2 cup batter and cooks a waffle in 3 minutes. 

    These waffles are light, freezer-durable and buttery to the point of not needing any extra.  Sandwiched with sliced bananas, wheat germ and natural peanut butter (and perhaps a bit of honey), reheated freezer waffles can get wrapped in foil for the trip to work. 

    Freezer Waffles
    Makes 8-10 waffles, depending on waffle iron size.
    Ingredients
    1 cup cake flour (substitute 1 cup regular all-purpose flour less 2 tablespoons + 2 tablespoons cornstarch)
    3/4 cup white whole wheat flour
    2 teaspoons double-acting baking powder
    1 tablespoon sugar
    3 eggs
    1 1/2 cups milk
    4 tablespoons melted butter

    Method
    1. Combine the two flours, baking powder and sugar in a large bowl.  
    2. Mix together eggs, milk and butter in a small bowl or 2-cup capacity measuring cup.  
    3. Add milk mixture to flour mixture and with a large spoon, combine with a few swift strokes.  Batter will have a pebbled appearance.  
    4. Cook waffles according to your waffle makers instructions.  In general, a waffle is ready when the steam dies down but has not ceased completely. If you have lost the instruction booklet start with 1/3-1/2 cup batter cooked for 2 1/2 - 3 minutes.

    Thursday, May 26, 2011

    Broccoli Spinach Soup au Pistou

    This is a great lunch soup, hot or cold, that travels well in a thermos to the office or hiking trail.  Also serve it to yourself as a late afternoon pick-me-up when dinner feels a little too far off.

    Low calorie versions of broccoli-cheese soup often use processed ingredients.  This version adds baby spinach to create a velvet texture and a flavorful bright green tint.  Parmesan cheese and basil stand in for the heavier cheeses and add a love hint of summer flavor.  Pistou normally includes a bit of olive oil with the cheese and basil but the soup is rich enough without it.  Pistou is like pesto but without the pine nuts.  A tablespoon of pistou, made from basil and Parmesan cheese incorporated into a bit of olive oil is used throughout the south of France to step up the flavor of soups and stews.  The combination livens up this simple broccoli and spinach soup and make it satisfying hot or chilled.

    Broccoli-Spinach Soup “au Pistou”
    4 servings
    Ingredients
    3 cups roughly chopped broccoli (including peeled stems)
    3 cups chicken broth
    1/2-1 cup water
    3 cups loosely packed baby spinach (half of 9-oz bag)
    2 T chopped fresh basil
    1 tablespoon freshly grated Parmesan cheese
    1/4 teaspoon salt
    1/8 teaspoon pepper

    Method
    1. In a large saucepan over high heat, bring chopped broccoli to a boil in chicken broth and water.  (Add enough water so that broccoli is covered.)  
    2. Turn heat to medium, cover and cook broccoli until quite tender, about 20-25 minutes.  
    3. Remove cover and add spinach.  With a large spoon, stir spinach into hot broth until it wilts. Remove soup from heat.  Add basil and cheese.  
    4. Use a immersion blender to puree vegetables in broth.  There should be no lumps.  (Or allow soup to cool for half an hour and puree in a regular blender.) 
    5. Add salt and pepper to taste.  
    Serve hot or chilled.  You might like a shot of skim or whole milk in the soup if serving hot.  If eating cold, serve with a dollop of sour cream or Greek-style plain yogurt.


    Immersion blenders allow you to puree soups right in the cooking pot. 

    Friday, May 20, 2011

    Pasta Salad


    For many of us, getting ready for beach weather means setting limits on carbs without going hungry.  The challenge for the pure-minded is that much so-called diet food uses additives for texture and flavor.  The ensuing sacrifice in flavor and health is off-putting.  Sometimes you need something really hardy between all those salads and this pasta dish makes the cut on both taste and nutrition. 

    Even non-whole grain pasta enthusiasts went for this pasta salad made with rotini-shaped pasta that picks up the creamy yet low-cal sauce.  The secret is an ounce of cream cheese. And yes, you can use regular cream cheese and still get the low-cal benefits.  The high ratio of  vegetables to pasta (especially mushrooms) also lowers the calorie count while the whole grain pasta makes it deeply satisfying.

    Whole Wheat Pasta Salad
    Serves 4, recipe can be doubled

    Ingredients
    8 ounces whole grain rotini (like Barilla)
    8 ounces portabello mushrooms, sliced
    1 tablespoon olive oil
    8 ounces asparagus, trimmed and chopped in 3-4 sections
    2 carrots, peeled and julienned
    1 ounce cream cheese
    1 tablespoon freshly grated Parmesan cheese
    1/4 cup leftover pasta water, low-fat milk or chicken broth to taste
    salt & pepper
    2 tablespoons fresh basil, chopped (other fresh herbs like tarragon, thyme or dill may be substituted)
    1.  Cook pasta according instructions on package and drain well. (Reserve a small amount of pasta water to use in the sauce.)
    2. While pasta cooks, heat oil in a large skillet over medium-high heat and saute mushrooms.  Remove from pan.
    3. In same skillet, add a 1/2 cup cold water, asparagus and carrots.  Boil over high heat, uncovered until water evaporates and vegetables are crisp-tender.  Cook a little longer with more water if you like your vegetables a bit more tender.  Lower heat to simmer. 
    4. Return mushrooms to skillet and add warm pasta. Stir in cream cheese and Parmesan cheese.  Add pasta water, milk or broth to thin the sauce so that it coats pasta well. 
    5. Sprinkle with chopped herbs and serve immediately or chill to use a cold pasta salad.
    This transports very well to a picnic, pot luck or the office.  A serving with a few slices of cooked chicken breast or tofu make a complete lunch. 

    While  meant to be a side salad served cold or room temperature, that first night it got gobbled up hot and never got a chance to chill.  The next day I added a little low-fat milk to moisten the leftovers and served it cold alongside sandwiches.

    Saturday, May 14, 2011

    Strawberry Time


    It’s strawberry season so why do anything to these bright red berries but enjoy?  If your backyard is yielding the naturally sweet and red through-and-through berry, then I would not do more than eat them as is.  Early season and cultivated strawberries, on the other hand, could use a little enhancement to intensify the flavor and remind us what a great strawberry really tastes like.  Simple Strawberry Compote is that enhancement.

    The beauty of some store-bought strawberry varieties only goes skin deep.  The perfectly shaped, large berries with pale interiors look picture-perfect but often lack deep strawberry flavor.  Smelling even sub-par strawberries makes us yearn for shortcake or pound cake topped with berries and cream.  Especially if you bake your own dessert, you deserve better strawberries.  

    Simple strawberry compote gives you juicy berries with real strawberry flavor and a little sauce to spoon over cakes, ice cream, custards and yogurt. 

    Simple Strawberry Compote

    Ingredients
    2 pints strawberries, hulled and rinsed
    juice of 1/2 fresh orange
    2-3 drops vanilla extract
    1/2- 1 teaspoon sugar or honey

    Method
    1. Slice berries about 1/4 inch thick.  Place in a microwavable bowl.  
    2. Squeeze orange juice over strawberries.  Stir in vanilla and sugar.  
    3. Microwave on high in 30 second intervals, stirring in between, until strawberries “wilt” and juices begin to run into bottom of bowl.  Remove and use at once or cover and cool to dip into at will.
    Strawberry compote keeps, covered and refrigerated, up to 2 days.

    This is also a great way to transform frozen strawberries.  Microwave them whole with the other ingredients.  Use the back of a fork to lightly crush them into bite-sized pieces. 

    Wonderful stirred into cream or an ice cream custard and frozen into strawberry ice cream.  And as always, enjoy them with plain real yogurt.  We have been seduced by Seven Stars plain yogurt with cream on top of late.  It’s made at a dairy outside of Philadelphia. 

    Sunday, May 8, 2011

    Dried Cherry-Almond Muesli

    My father used to bring unusual foods back from Europe when I was a child.  Several became family favorites despite initial skepticism.  One of those was muesli.  One spring day, my father got through customs from Switzerland with several boxes of what appeared to be saw dust and crushed crackers clinging to raisins.  With enthusiasm my father served us 1/4 cup portions doused with milk.  It was a far cry from Sugar Pops and I didn’t even like them much (not being big on cereal as a child).

    This was my first taste of grown up cereal and probably the closest we could come in the 1960s to organic or all natural food.  The sweetness was derived solely from the dried fruit—which turned out to be dates as well as raisins.  The sawdust and crushed crackers were in reality wheat, oat and rye grain flakes, slivered almonds, sunflower seeds and other ingredients we now recognize as “high fiber.”

    Muesli is raw food’s answer to granola.  And while most Americans enjoy granola on its own, in bars or as cereal it has become almost as sweet as the aforementioned Sugar Pops.  It’s hard to find a low-calorie/low-fat granola without making your own. (More on this in future weeks).  Muesli is pure grain goodness and very low in fat. 

    The thing about eating foods like muesli when you are young, even if you don’t immediately take to it, is that you have a memory of a highly satisfying, not too sweet, crunchy snack that goes well with milk.  You find yourself searching it out years later.

    Happily, we no longer have to transport muesli from Switzerland in our suitcases.  There are some good makers on health food store shelves and muesli is also surprisingly simple to make from scratch.  I made a batch the other morning that I’ve enjoyed soaked in a bit of milk and/or yogurt with some fresh berries.  As promised, complex and filling enough to get through a morning thanks to all that fiber and lightly sweet from nuts and dried fruit flavors rather than sugar.

    Grain flakes are the main ingredient—these look like rolled oats and come in wheat, barley, spelt, rye and oat varieties.  Pick them up in the cereal or natural food aisle at the supermarket.  They are often combined and called 5- or 8- grain cereal.  (Bob’s Red Mill makes a nice 5-grain version.) From there raid your pantry for nuts, seeds and dried fruits.  You can even add commercial stand-bys like shredded wheat cereal and grape nuts.  Here’s one recipe that will give you a sense of proportions.  This one is for cherry-almond muesli.

    Dried Cherry-Almond Muesli
    Makes 6 1/4 cup servings
    Ingredients
    2 cups mixed grain flakes
    1/4 cup dried cherries
    1/4 cup sliced almonds
    2 tablespoons roasted sunflower seeds
    1/2 teaspoon cinnamon

    Method
    1. Mix all ingredients together in a covered container. 
    2. Serve in 1/4 cup portions with plain yogurt or milk, berries, and if desired, honey or maple syrup.  If you've never eaten muesli before, allow it to soak for a few minutes in the yogurt or milk before consuming.   
    Other combinations: 1) raisins and peanuts, 2) dried apricots pieces and chopped hazelnuts with pepitas, 3) dates, coconut and a touch of ground ginger or 4) dried pineapple pieces and walnuts, etc.

    Several years ago we stayed at a Vermont inn owned by an Austrian couple.  The breakfast buffet included one of my favorite ways to enjoy muesli.  Muesli is mixed with plain yogurt and grated apple and left overnight (covered and refrigerated).  The grains are sweetened by the grated apple and soften and plump up in the yogurt.  Serve with a drizzle of honey and garnish with some finely chopped nuts or wheat germ.   Use about 1 cup yogurt, 1/4 muesli and 1/2 a grated apple per serving.